Eldertuin The Fortress
Buff Stealin' Shield Crushin' Gladiator

Abstract
This build is centered on taking advantage of
Without stolen buffs, this build can deal 2.9m Combined DPS, has 190k Phys eHP and 100k Elemental eHP. This build was made in Softcore Trade league. It is not SSF viable due to the uniques required, and it MAY be Hardcore viable (untested). This can also be used as a league starter.
Key Mechanics
Attack Speed
This build relies on hitting the target many times per second in order to leech life and stack multiple Impales and Bleeds as fast as possible.
A high quality
With our gems & equipment giving us about 100% increase, our passive tree, Gladiator ascendancy and cluster jewel (
This should push us above 8 attacks per second before stolen buffs. At the hideout, without Challenger charges, Onslaught and attack speed bonuses while Fortified and while Leeching, the build should have about 5.5 attacks per second on the character sheet. Note that we are ignoring accuracy since we’re using a
Since this build uses a corrupted
Impale & Bleed
Even though Shield Crush can deal a significant amount of damage by itself (esp. with a high Armour shield), the build deals approx. half of its damage via Impale and Bleed stacking. Both of these mechanics takes advantage of the build’s high attack speed.
Impale stores 10% of the initial hit’s Physical damage, and deals the recorded damage to the target each time it is hit again. It remains until the maximum of 5 impale stacks is reached, which we are able to apply in one second. This is why we are aiming for at least 6 attacks per second. In addition, we also try increase the stored hit using increased Impale Effect via our high quality
We also apply eight Bleed debuffs via
For an easier time clearing maps, we are also using
Inspired Learning
The When you kill a Rare monster, you gain its Modifiers for 20 seconds, especially since every Rare monster would have at least three modifiers. It is also the rarest item in the game, with the lowest chance of dropping (or being chanced), which means it is also one of the most expensive.
Inspired Learning is different from Headhunter in two other ways: it is a Jewel instead of a Belt, and it requires four allocated notables inside of a small radius in order to activate. The build puts Inspired Learning at the Jewel Socket south of the starting position of the Duelist, and allocate
Note that even though the stolen buffs stack, their duration is not reset for each Rare monster slain. This is why we are using
Since we are already using a Vulnerability curse on hit Ring, we can either use a Solstice Vigil with a very rare You can apply an additionl Curse corruption, or use a Windshriek (or a Windscream while levelling).
Speaking of Headhunter buffs, there are monster affixes that we can steal but do not benefit us. With
If we use
Armour & Block
With almost 3000 Armour on our shield and almost all of our gems being red, we are going to have a lot of Armour. We also get several nodes on the passive tree that increase our Armour, plus we’re using a high quality
The build takes almost every chance to block node on the passive tree that is near the Duelist. We are also using a
We also have
Reckoning
Even though the build is using a
Movement & Utility Skills
We already have a high Armour shield so the build uses
Since we have to use a triple green
Gear, Flasks & Gems
Equipment
Here are the unique equipment that the build uses:
Anoint
On the remaining slots, prioritize Rare equipment that has Armour, Maximum Life, Chaos Resists and Elemental Resists. The Helmet should have the Eternal Labyrinth enchant 15% Increased Shield Crush Attack Speed and your Ring should have the Warlord influence mod Curse Enemies with Vulnerability on Hit. Your Rare shield should have 3000 Armour minimum, and at least 26% Chance to Block.
Jewels (Abyss, Base & Cluster)
Because more than half of this build’s gear is unique, any Rare item that can have Resistance and Life should have it. Prioritize Chaos Resist, Elemental Resist and Maximum Life on Rare Jewels. Unfortunately, these are the most expensive pieces used by the build.
The two Abyss Jewels socketed on 5% Increased Attack Speed and 6% Increased Impale Effect affixes.
We are using the following Jewels on the Passive Tree. The build can use three base jewels, and each should have +1% Chance to Block Attack Damage while holding a Shield affix.
The Cluster Jewel should have Eight passive skills, 12% increased Attack Damage while holding a Shield affix,
Flasks
Skill Gem Links
Note that Awakened, Alternate and Quality Corruption on gems are not required by the build. Feel free to use gems from Lily Roth.
(Keep this Level One to ensure the buff is always active) (Leap Slam can be swapped for Shield Charge if you prefer that playstyle)
Feel free to use any other four link skill here.
(Only use Vaal Totem since we don’t have Multiple Totem Support linked)
You can use a high quality Dread Banner instead of a Defiance Banner for 5% more damage (Increased Impale Effect) at the cost of 3% less physical damage reduction (about 3,700 Armour).
(Not linked with Cast on Death)
(Keep this Level One)
Passive Tree & Path of Building
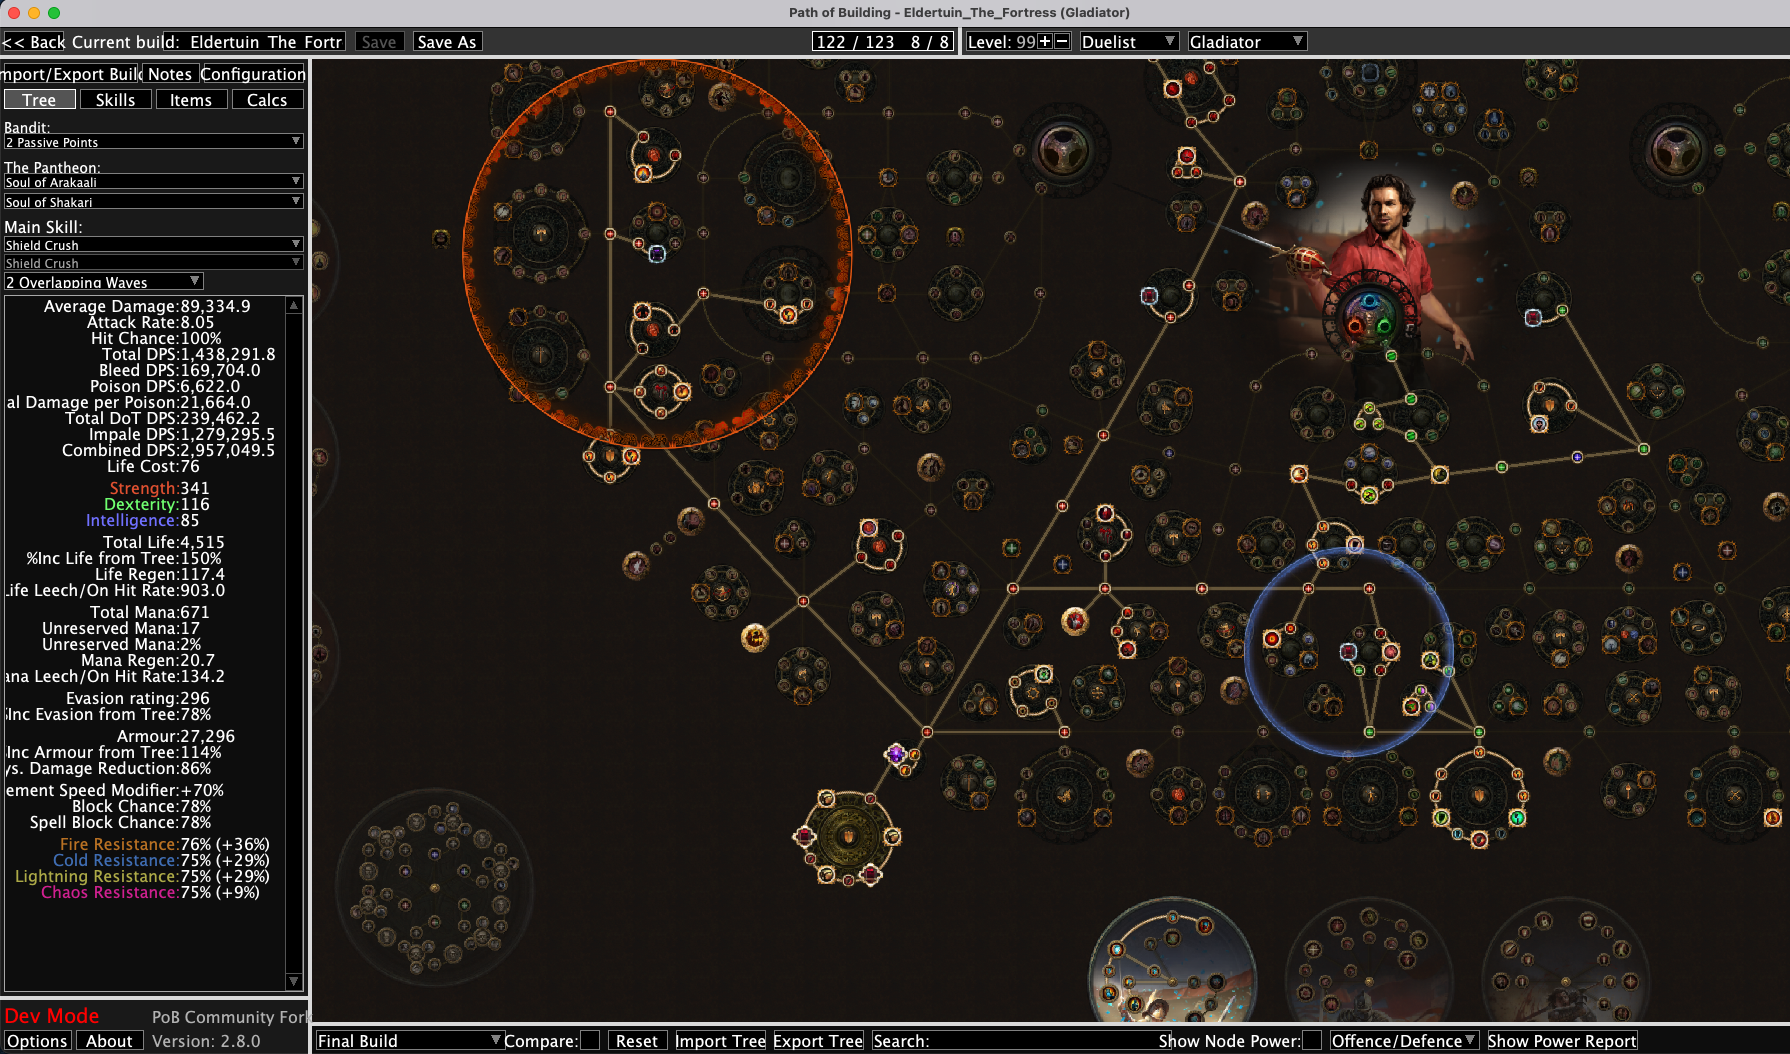
You can see the Passive Tree, Equipment and Skills via PoEPlanner. For the damage calculations and the levelling passive tree, you can import this pastebin link to the Path of Building Community edition.
Ascendancy
Get the following Gladiator ascendancy notables in this order:
Bandit & Pantheon
We need every passive point we can get: Kill All Bandits. As for the pantheon, it’s especially tricky to get Chaos Resistance, so I recommend the Soul of Arakaali (5% Reduced Damage from DoT) with the Witch of the Cauldron (+25% Chaos Res. vs DoT) and the Soul of Shakari (5% Reduced Chaos Damage).
Frequently Asked Questions
Can I use this build to farm…
- Bestiary: Yes. Bestiary monsters are Rare monsters that we can steal buffs from.
- Delve: Kinda. We don’t have that much firepower to get into deep delving.
- Incursion: Yes, but Leap Slam would be a better movement skill rather than Shield Charge.
- Betrayal: Kinda. Not enough Rare monsters.
- Breach: Yes. Again, Leap Slam would be better especially on maps with elevation changes.
- Harbinger: Yes. The Harbingers can create multiple Rare monsters.
- Abyss: Yes. Everytime the Abyss “crack” stops, it always spawns at least one rare.
- Legion: Kinda. Something that Chains would be better, but the Bleed pop helps.
- Blight: Kinda. Same as Legion above.
- Metamorph: Kinda. When the unique summons its rare mobs, the fight will suddenly become easier.
- Delirium: Kinda. The fog does not spawn many Rare monsters.
- Harvest: Yes. Focus on the big seeds to steal their buff, then clean up.
- Heist: Yes. After the alarm, Rare monsters spawn a lot.
- Ritual: Yes. Starting at the third Ritual, a lot of Rares are spawned.
- Expedition: Yes. Rare monsters spawned always have Ward, so burst those down first.
How do you sustain mana when 98% of your mana is reserved?
- I don’t. All active skills are linked to
.
Why is this build named Eldertuin The Fortress?
- I randomly got an
while gambling with Expedition League’s Gwennen. I was already looking for another build to make, having about 10 watchstones unlocked on the atlas, so I decided to check where I can use the mini headhunter jewel. When I saw that the socket near Duelist is easy to get, with access to an Endurance, Armor, Life and Bleed notables, I decided to make a Shield Crush + Shield Charge build. The name of the build came from the web serial The Wandering Inn, where there’s an adventurer named Eldertuin The Fortresswho is known from using his shields. Also, this build uses a, which is very apt considering the events currently unfolding at Book 8.